
Thursday, May 11, 2017

Growing Fresh Mushrooms at Home

Growing our own mushrooms is one of those things i've been wanting to do forever, but hadn't quite gotten around to it. i love foraging for morels, and have been learning a few other wild mushrooms that grow on our land and are safe to eat like chanterelles, giant Puff balls, lion's mane and more. i've posted about foraging mushrooms before.  i also grew oysters from a kit several years ago, 

i started looking into mushroom plugs last year, and found that they are really quite inexpensive. The problem i had was that i needed fresh cut logs to plug, and also holes drilled into the logs. Both of which required a bit of help from the husband. Sometimes our priorities are not the same, so i never got them started last year


Kenan did have a interest in growing mushrooms though,  and so he attended a mushroom woodshop last fall. This spring he decided he was ready to try growing mushrooms and put in an order to Mushroom Mountain.   i was really just interested in trying shiitakes, but he went all out and bought a bunch of different mushroom spores to try. 


Earlier this spring while he was working on clearing/flattening part of our land that may eventually be the new Tiemeyer Glass Studio, he cut down a large branch of oak tree.  The tree had been damaged several years before when we cut trees to pay for the new house. It was alive, but had a lot of damage to part of it, and really needed to be cleaned up. So the damaged area came off, and Kenan cut it  up for mushroom logs. 
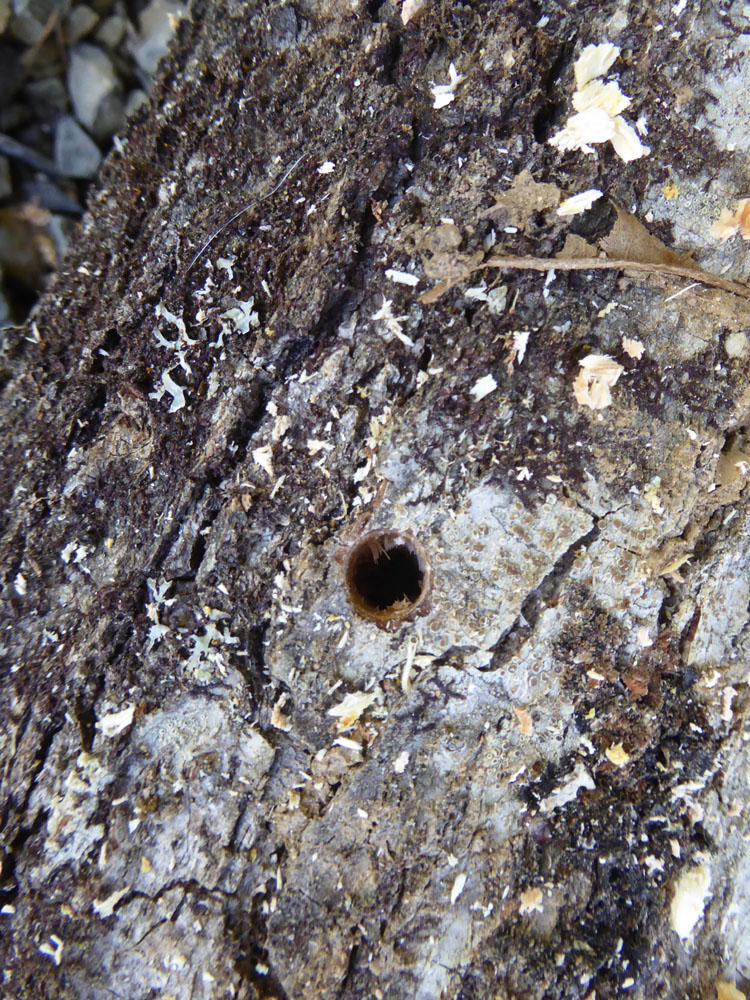

Growing mushrooms, is really pretty easy! First, the wood has to be freshly cut (usually within 6 weeks is okay) oak, maple, sweet gum, poplar, or other deciduous softwoods will work. Soak the logs by immersing in clean water for 1 – 2 days, but let the bark dry before inoculating.  Logs and stumps can be drilled, these are about 1/4 " diameter holes.  


The holes are then filled with wooden plugs that are colonized with the fungus of your choice.  We used a hammer to pound them into the logs.


 After the plugs are in, you can wax the surface to seal them in and protect them from drying out. .Once plugged, you need to soak/water the logs a couple times a week to keep them from drying out and then all you have to do is wait! When the mushroom’s root system has threaded itself throughout the log or stump, it will want to start fruiting. Fruiting can be seasonal, depending on temperature, and last several years.


This is a log  Kenan inoculated at the mushroom workshop last year. It has been completely neglected, just left outside and watered only by the rain. So we were a bit surprised to see this gorgeous Shiitake appear right next to one of the plugs.  At the suggestion of a friend, we soaked the log for 24 hours, so hopefully we'll start to see a few more appear.

This is pretty reassuring. If we can grow them without really trying, imagine if we put a bit of effort into them! We may actually get some good mushroom harvests! i believe the plugs we are trying are shiitake, oyster, lion's mane and hen of the woods. If these grow well, i'd love to try out some other varieties. Mushroom Mountain has a really good selection, and have great customer service.

You can also find more info about growing mushrooms here.

Tuesday, May 9, 2017

How to Start Sweet Potatoes

Starting sweet potatoes is really easy. Each year i grow slips from last years harvest. i keep my sweet potatoes in a basement cold storage room. In early spring i check through the sweet potatoes and look for any signs of sprouting.


Once i find a few that are sprouting i bring them upstairs, and place one end in a jar of water in sunny window.  


The Sweet potatoes will begin to grow roots in the water and the sprouts will grow quickly.  One the sprouts are several inches long, i pinch them off and put them in a jar of water.


Sweet potatoes like a long growing season, and really like heat. So once the temperatures start warming up in the spring, the potatoes really start sprouting quickly. i swear they grow a couple inches a day. One potato can produce a ton of sprouts, so you really don't have to sprout a bunch of them. Just a couple sweet potatoes will produce enough starts for a new crop of sweet potatoes.


The starts will grow roots quickly in the water. Then they can be transferred into starter pots with soil or right into the garden if it's warm enough. i don't usually plant them in the garden until the second week of May.

Sweet potatoes are really easy to grow and store well over the winter if kept in a cool dry place. The only real problem i've had with them is the voles love them too. They will snack on the tubers without killing the plants, so you won't even realize you have a vole problem until you go to dig them in the fall and there are no sweet potatoes!

This is one of the reasons it's good to rotate your crops. Each year we move the sweet potatoes around and hope the voles don't find them again.  Last year we grew 2 different types of purple sweet potatoes, along with the regular, but neither of the did very well. i was able to get one of the purples to start sprouting though, so i'm hoping to try them again this year. i still have another week or so before i put these outside.

i'm already gearing up for a busy garden season!


Wednesday, April 26, 2017

Personalized Prints on Wood by Cut Out Art- Review and Giveaway!

i recently had the opportunity to order a custom wooden print from Cut Out Art.  CutOutArt.com is a company based out of Lake Forest, California that allows you to upload your photos and have them printed onto wood.  Their unique printing procedure ingrains your pictures straight onto a ready- to-hang Wood Panel.  They offer a variety of sizes and styles, as well as different options for customizing your print to make it extra special. They take pride in every piece they print!


Creating a custom print is very easy. You can upload your photo from your PC,  Facebook or Instagram. There are different options for customizing: you can add text, a background, different images and symbols.  i created an 8 x 12 custom print.  This style was really intended to be a landscape, but i really liked this photo and it didn't fit as a landscape so i used it sideways and it still came out great!  There is a little (?) symbol at the bottom and if you click that it will give you a tour of the page and show you what the different features are and how to use them. 


The ordering process was very quick and easy! After submitting my order, i received an email letting me know my order had been received and then another when it shipped out. Shipping was quick and i'm super pleased with it. i love how you can see the wood grain through the print. 


All wood prints include a simple keyhole slotted hanging system and two mounting screws on back for hassle free hanging. The prints are heat and water resistant, and simple to clean with just a damp cloth. Every wooden print has it's own unique wood grain which shows through the print very subtly. 

i really like the wooden print that i received and i love that the company uses environmentally friendly inks, and wood that has been harvested in a sustainable way. Each piece is handcrafted in the USA and a portion of each purchase is donated to Charity Water.

The generous folks at Cut Out Art were kind enough to offer a custom 8 x 12 wooden print to one of my lucky readers!  Please enter below using the rafflecopter form, you may have to wait a minutes for it to load! This giveaway is open to US only. 

a Rafflecopter giveaway


i received a product in exchange for my honest review. i was not compensated, my opinions are my own. 

Monday, April 24, 2017

Morel season!


Spring is my absolute favorite season. There are so many things waking up, and if you blink you'll miss it. Every year when Spring Break comes around, Kenan starts making plans for different places we can go. It always bums me out a bit, as there in no place i would rather be in the spring then here. 

With the kids in school, we have to take advantage of their vacations and breaks if we want to go anywhere...which means every spring, i feel like i miss so much.

This year was no different. Everything was just starting to open up and bloom and we were making plans to head to Florida. 


My morels usually start popping the second week of April, which is of course when we were going to be gone.  Our weather had been unseasonable warm, so i had a feeling morel season might be a bit early this year. So a few days before spring break i was out hunting morels.

i found these brand new tiny morels just starting to emerge. The largest one in this photo is only about an inch tall. They were all super tiny, so i covered them with leaves marked the spot and left them until we returned.


When we got back from our trip, i went out to check the morel spot before i even unpacked. As i was searching for my marked spot, i found this one. i was so excited that i hadn't missed them entirely. When i found my marked spot i was disappointed to see that they were all gone. It looked like they had just dried up from the lack of rain. 


i started hunting for more in the area, and was excited to find several that were a good size. They were just starting to dry in places and if i'd waited a day or two they would have been too old and unusable. 


i picked all of these in just a matter of minutes. They had all come up in the same small area that i've found morels in before, so i already knew where to look. They are not usually so easy to find. 

i went back out hunting a few more times that week and found 4 more, still in this same area. i hiked out all through the woods hoping to find another patch, but didn't find even one.  In years passed, i have found random morels in the strangest of places. We had a couple come up next to our mail box, a few in the flowerbed, a couple on our trail down to the creek and a couple more under the apple tree that is next to the creek. Many of our old reliable patches have since dried up.  They are so unpredictable, but always a joy to find.


With spring comes real food! My leafy greens are finally ready to harvest. The asparagus has just started coming up, my hens are laying like crazy and i have fresh herbs to incorporate into my meals. i get into such a food rut over the winter, and although i can purchase fresh vegetables at the local grocery store, it's just not the same as harvesting your own from seeds that you grew, nurtured or foraged yourself. Spring is truly the time of hope and new beginnings.


It was such a pleasure to sink one's hands into the warm earth, to feel at one's fingertips the possibilities of the new season. ~Kate Morton, The Forgotten Garden

Sunday, April 23, 2017

Bouchard Chocolate Cheesecake Bites- Product Review


 i was invited to review some Belgium chocolate cheesecakes bites, so how could i say no? :) The whole family helped to test and review these and they got a unanimous double thumbs up. They are seriously delicious!!


Bouchard chocolates has been perfecting the art of chocolate making from the historical city Ghent, Belgium since 1931. The box contains three different flavors. Dulce de Leche, Strawberry and chocolate fudge. These are perfect for those moments when you just want to indulge.  


The chocolate is crisp when you first bite in, and then super smooth, melt in your mouth goodness.
They would make a wonderful Mother's day gift. (hint, hint) They are all so good, i can't even pick a favorite.

 You can find Cheesecake Bites this spring at your local Walgreens. they retail for around $10 a box.  Visit the website for more information about Bouchard chocolates. https://www.bouchardchocolate.com

i received this product at no cost in exchange for my honest review, i was not compensated.