Thursday, March 31, 2011

Adventures in Salamander raising...

About a week or so ago, we went on a hike and came home with frog spawn and salamander spawn. Our tadpoles hatched the day after we came home. i'm guessing the heat of the house helped them along a bit. i'll post some pictures of them soon. They have already quadrupled in size.

We are still waiting for our salamanders to hatch.


This is what our Salamander spawn looked like when we first brought it home on March 20th. Each egg had a very round black dot inside it.


Two days later on March 22nd, the dots have begun to elongate just a little bit. We were able to observe what looked like the heads forming on a few of them.


By March 25th, heads and the beginnings of tails have formed.


March 29th. You can begin to see the heads and tails, and they are starting to look like tadpoles. Some of the eggs in the very center of the jelly mass began to look fuzzy and stopped developing. We found some info online suggesting that sometimes the eggs in the center will die and need to be removed. So i took out the 'bad eggs' and in the process of a few of the living eggs came loose from the protective jelly.

This little egg is 6-7mm, about the size of a pea.


This has really allowed us to observe the some of the details that were difficult to see when the eggs were in the jelly. You can clearly see the head, tail and feathery gills. The Spotted Salamanders usually hatch within 4 to 8 weeks depending on the water temperature.

This is our first time observing them, so we are very excited to see them finally hatch! i will post updates as they begin to hatch and grow.

You can find some info about Salamander lifecycles and a printout at Enchanted Learning.

Wednesday, March 30, 2011

Wordless Wednesday: Daydream Believer


My 4 year old daughter was being a little too quiet so i went to see what she was up to, and found this. She had been playing dress up in my room, and found my wedding dress in the back of the closet. i grabbed my camera and snapped this shot. :)

Tuesday, March 29, 2011

Winter's not over...

Just when i really start getting into Spring mode, Father Winter deals us another harsh blow. Yesterday we woke up to this....snow.


okay, so i wasn't really that surprised. Every year i take a similar picture, my daffodils all knocked down and covered in snow. Some years they are covered in a layer ice, either way they almost always recover. We will get another hard frost/freeze and possibly snow right about the time the peach trees and blueberries begin to bloom.


This is my poor cherry tree that was covered in bloom. For years we though this this was purely ornamental as it didn't produce fruit and it didn't grow like a regular cherry tree. Then, rather unexpectedly, last year it had cherries on it. It only had a few, and they were small...but sweet. After a bit of research, i finally figured out that it is a Nanking Cherry. Which grows more like a shrub than a tree. It is a favorite to edible landscapers, because of it's small compact size, edible fruits and it can be grown as as hedge/screen. Although they sometimes self pollinate, you should really plant more than one to ensure proper pollination. Had our little cherry tree not self-pollinated last year, we never would have realized that it was a fruit bearing tree. So now we are on the hunt for a couple more of these cherry shrubs. The fruits can be eaten raw, or cooked into jams and pies. It is also a favorite snack for song birds, making it a nice shrub for those trying to create wildlife habitats in their yards.

Sage began begging to go out and play in it as soon as she woke up. She ran, jumped, and rolled around in it. She made a snow angel, sledded down the goat hill, and attempted to make a snow man (there was only bout 2" of snow). We played until our toes were froze.


One last magical winter moment before the sun begins to melt it all. Then we will go back to dreaming about gardens and flowers and butterflies and all things Spring.

Sunday, March 27, 2011

Rock Paper Tree- Artist Feature and Giveaway! CLOSED


Rock Paper Tree is a online store specializing in handmade precious metal, crystal and gemstone jewelry and pendulums. Unique gift ideas, journals, specialty gift baskets and lots of crystals and minerals.

about Teresa Peters...

I have always been drawn to ancient and mythical realms and wanted to create objects that resonated with those energies. I also have a strong connection to most stones and crystals and it’s important to me that each piece I create is more than just beautiful.

I use stones that have particular healing or empowering qualities and then combine them in a way that enhances them even further. I started making special things for friends when I wanted to find a way to lend them support. In general, the best way I know to support someone is to help them align with their own strength and resources. The connection to earth and spirit energies through gemstones and crystals is what has always comforted and inspired me, so that is what I hope to share. I choose stones for their beauty and energetic properties.

I use all natural stones in my designs. When I work on each piece, I take the time to create a peaceful space and to feel connected to positive energies of the universe. I allow inspiration to come to me and to work through me in order to create pieces that will resonate with the person who chooses them. I like to think I’m making each piece for someone in particular, even if I don’t know who they are yet.


Every spirit doll is made from many different and beautiful stones that each carry their own balancing, harmonizing, empowering, and enlightening energies. When combined, they sing an even more powerful song. They are a force of light that is focused on aiding you in the creation of your own highest good.


For the rest of the month of April, anytime you shop at Rock Paper Tree, use coupon code 2trees50 at check out for 50% off your total purchase of Crystals and Pendulums! Stock up.

Also, as a special gift Teresa would
like to offer anyone who's entered the giveaway a free gift if you make a purchase from Rock Paper Tree . You may choose between either a quartz heart or amethyst sphere (approx 1 1/4") Just leave a note during checkout that you entered the giveaway!
CLOSED

Now for the GIVEAWAY!!
Teresa has offered one reader this beautiful Spirit doll.

MANDATORY ENTRY
Head over to Rock Paper Tree and let me know your favorite item!
Please include your e-mail address in the format of yourname (at)email dot com or make sure it is visible in your blogger profile so i have a way to contact you if you win. Otherwise a new winner will be chosen!

EXTRA ENTRIES (make sure you did the mandatory first!!)
please leave a new comment for each extra entry. If you qualify for 5 entries, leave 5 separate comments.


1. Subscribe to the Rock Paper Tree Blog RSS or email (buttons at bottom of page).
2.Subscribe to the Mom Grooves Blog RSS feed or email (upper right).
3. 'like' Rock Paper Tree on facebook
4. 'like' Mom Grooves on facebook
5. Follow MomGrooves on twitter ( leave your twitter name)
6. Follow my The Enchanted Tree blog via google friend connect. 1 entry
7. Be a fan of The Enchanted Tree on Facebook. 1 entry
6. Share this giveaway with your facebook friends! 1 entry
7. Tweet about the contest, include @MomGrooves and a link back to this post. Leave a link to your tweet.
8. Blog about the giveaway. Include a link to Rock Paper Tree and to this post, leave a comment letting me know where to find it. 1 entry


**Rules**
  • Giveaway ends April 9th. st 11:59pm EST
  • Winner will be chosen via Random.Org. i will then contact them by email, and post the winners name on my blog.
  • Winner will have 48 hours to respond to the email or another winner will be chosen
  • This giveaway is open to US only.

Friday, March 25, 2011

Special Bendy Doll Giveaway for facebook fans!


Over on my facebook page i'm giving away this adorable Easter bendy doll!! The bunny ears are tied on with a ribbon and are removable. The basket is made from an acorn cap, and the 'easter eggs' can be planted in your garden for a extra surprise. :)

To enter simply visit my facebook page and leave a comment under the Giveaway doll picture. Comments on this post are welcome, but are not valid entries for the contest. i will randomly pick a winner on March 28th! Good Luck!

Simple Bright Moon Winner Announced!!

Drum roll.....and the winner is....


the names samma. said... 44

I'm a fan you Enchanted tree on fb.


Congratulations!!! i'll send an email later today. You will have 48 hours to claim your prize or a new winner will be chosen!

Thank you all who entered!!!

Thursday, March 24, 2011

Garden projects.

We are really getting into spring/gardening mode and have been having fun with some different garden crafts and projects.

Now that our hens laying again, we have no shortage of egg shells. Each time we use an egg, i wash out the shells and put them aside instead of adding them to the compost. These make great starter cups to start your seeds in, they are biodegradable and add calcium to the soil.


These are an easy, waste-free alternative to buying seed starter trays. Just add a bit of organic potting mix to each egg cup, plant your seed and add a bit of water. Sage helped with the watering by using a plastic syringe to deliver just a few drops of water to each seed. You could also use an eye dropper, you just want to make sure not to over water them to prevent the seedlings from damping off/ molding.


Give them a bit of water each day if the soil looks dry and in just a few days your seeds will begin to sprout. Once the plants are big enough to be transferred you plant the entire egg cup in the ground.


We also made seed tapes. These are great for planting things like carrots, and lettuce and anything else with tiny little seeds. i've never been good at spacing or planting my rows straight...and these make it easy. It also eliminates the need to thin your seedings.

To make seed tapes all you need is some newspaper, cut into long stripes.
A bit of flour mixed with water to create a thin paste.
small paintbrush.
Seeds of choice.

Using the paint brush put a dot of flour/paste on the newspaper strip and place a seed in it. Do this every 1-2" inches or how ever far apart your seeds need to be placed. according to the package. After ours dried, i put another dot of flour/paste over each seed to make sure it was secure. Once it is completely dried you can roll them up until you are ready to plant them.

This is a really good tutorial for making seed tapes. Ours did not come out nearly as pretty. :)


We really love the garden and nature craft section on the Family fun website, and find tons of cool projects there. When we came across the project for a Hanging Garden Seed Starter i had to try it. i use a book of trading cards sleeves to organize my seed stash, so i had some extras we could use for this project. i thought this would be a great project for the kids to seed the seeds develop roots and begin sprouting.


First thing we did was add a couple spoonfuls of organic potting mix to each pocket. Then we picked out our seeds and made sticker labels for each pocket to identify our seeds. We placed a seed in each pocket and added a few drops of water, using the syringe like we did above. We had to use a tape to keep our pocket sleeve from curling in on itself.


When the seeds begin to sprout the root system and plant is visible through the clear pocket. It was interesting to see which seeds sprouted first, and which we are still waiting on. We had two seeds rot, so we removed them and added new soil and seeds. Once the plants get bigger we will have to move them into their own pots, but it is really a fun way to observe them.

i have a few new artist features and giveaways in the works! So watch for those.

Wednesday, March 23, 2011

Cone Flower Hedgehogs :)

Earlier this week, i took the kids hiking and we came home with our usual basket full of pinecones and acorns. i've had them just sitting out on display, but planned to eventually use them for nature crafts. We had so much fun making these nature crafts a few months ago, i knew i needed to keep these items on hand for more nature creations.
Yesterday Sage was playing with the acorn caps, and left a few sitting on my computer desk. The more i stared at them, the more i thought they looked like hedgehog faces. i just needed to find something spiny to use as their bodies. Later that day i was working in my flower bed and as soon as i saw the Coneflower seed heads i knew that little miniture hedgehogs would soon be born. Did you know Echinacea comes from the Greek echinos, which means hedgehog? :)


This is what i came up with...isn't it cute?!


These are really simple to make. All you need is acorn caps (the gnome hat kind), small pinecones (for ears), small seeds ( for eyes), coneflower seed heads and craft glue.


i'm not sure which type of oak produces these acorns, but this is the type you want.


First thing, you need to cut the stalks off of your seed heads. It is okay to leave a little 1/8"-1/4" bit sticking up, as long as you can still glue the cap over it. Then you put craft glue around the edge of your acorn cap, and stick it to the seed head covering the place where the stalk used to be.


Now you need the glue dry for a bit. i find that my mini-muffin pan works great to help keep them upright while the glue dries so that the acorn caps don't slip off. Once the heads are glued on, i snipped some of the spines in the place that would be the hedgehogs belly so that it sat flat on a table and didn't roll.


i used pine cone scales for the ears. i snipped them to the size i wanted, and then glue them in place with a drop of glue. i used columbine seeds, because they were the perfect size...but any small round seed would work. i applied a dab of glue with a tooth pick where i wanted the eyes to be, and then used the same tooth pick to pick up the seed and place it on the face.


That's it! Super easy, and look how cute they are!! This is a great project for school aged children. Preschoolers may enjoy it, but will probably need a bit help with the ears and eyes. If you try this craft i would love to see how your hedgehogs turn out! i have a couple other acorn/pinecone critters in the works, that i will post soon. Have fun with these!

Wordless Wednesday: Spring has Sprung


Spring has officially sprung in the Blue Ridge Mountains. Flowers blooming everywhere, asparagus is popping up. i spotted my first butterfly, a Comma, earlier this week but didn't get it's picture. Good bye winter, you will not be missed!

Monday, March 21, 2011

Beaver Dam Creek

This weekend we had fantastic weather and decided to take advantage of it and go for a hike. We are in the prime area for hiking. We are centrally located to the New River Trail, the Blue Ridge parkway and the Appalachian trail. We also have many other local places to hike like Buffalo Mountain, Rock Castle Gorge and the Cascades. This weekend we were looking for something different though and decided to check out Beaver Dam Creek trail. It is a short trail but it's quite close.


i brought Sequoia to this trail many years ago, when he was only a toddler. We didn't get very far down the trail, because it was really hot that day and had to carry him. i started on the lower parking lot, and had to walk behind a factory, across a police shooting range and along an area of barbed wire and electric fencing before even getting to an area that looked like a nature trail. When i finally got to the trail head, there was this warning sign and another one for bears. i was hiking alone with my toddler, whom had to be carried and no cell phone.
So needless to say i did not really enjoy my hike that day.

We decided to try it again, starting at the other end of the trail and give it another shot.


i'm so glad we did. The Beaver Dam Creek trail is part of the Virginia Birding and Wildlife Trail system on the Blue Ridge Highlands Loop. It is only about 1 mile long, and follows the Beaver Dam Creek through the woods and along open fields. When we first entered the trail i spotted Skunk cabbage coming up everywhere!

As we walked the creek was on our left, and their was a beautiful field with horses in it on the right. Almost as soon as we entered the trail we saw a huge wild turkey running across the field. It was too quick for me to get it's picture, but it was definitely a Tom, with it's huge tail feathers dragging behind it. Very cool to see.


Less than 1/4 mile along the trail and we happen upon a huge puddle filled with tadpoles and frog spawn! i knew we would have to bring some of these home with us if we could find a cup or something to keep them in. We love to raise tadpoles and release the frogs after they've matured. The frog eggs were protected in a little bubbles of slimes. It was really a cool sight to see. There were many tadpoles that had already hatched, and many still in the eggs. It was neat to see them in the different stages of development.


Just a little farther up the trail we spotted more egg masses. These look quite different from the frog spawn. i know it's tough to see in the picture, but those cloudy spots are masses of eggs all enclosed in one large slime mass and connected to a plant. They are not separate bubbles like the frog eggs. In the center of this puddle, i saw something spotted and though it was probably the mother. We used a stick to try to get it to move so we could get a better look at it. Unfortunately it turned out to be dead, but it is a Spotted Salamander and i'm guess that is what the eggs belong to.


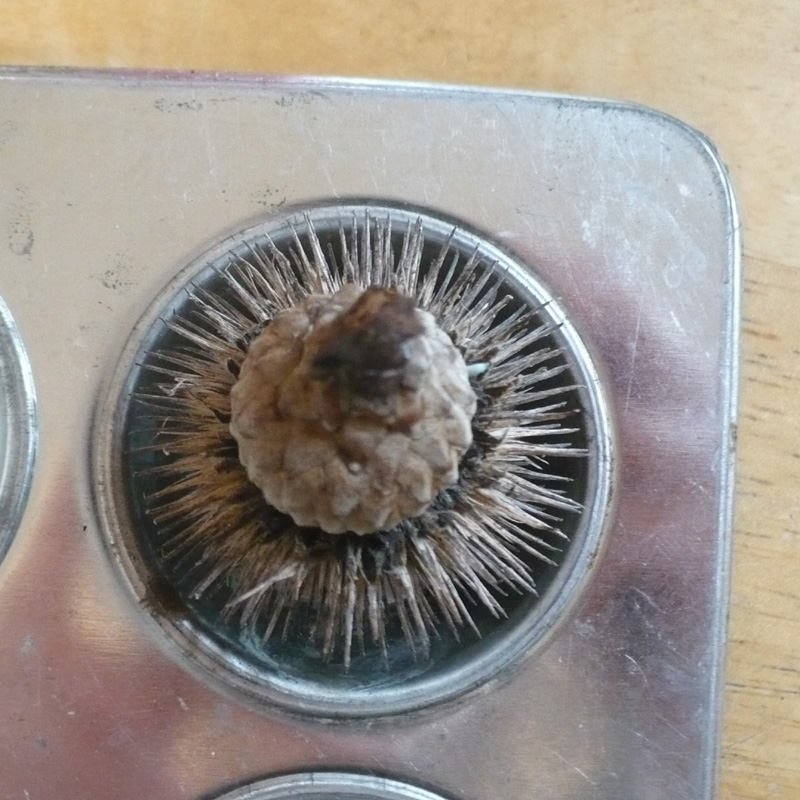
Sage found this interesting looking fungus. There were several of them growing together in a patch. This is a Myriostoma fungi, also called an Earthstar.


The creek was beautiful, and the kids had fun climbing the rocks and skipping stones in the creek.


Can you see the debris on top of the bridge? That is from flooding that happened in this area. Many of the bridges were covered in leaves, mud and garbage and other showed quite a bit of damage from recent flooding. On of the bridges we crossed had the metal railing completely bent and another had to have the rock at the base repaired where the bridge had literally been ripped away.


The creek was really very peaceful and the trail although short made for a very nice walk. We could hear spring peepers and several different birds calling although we didn't see them. i look forward to coming back later in the spring when the wildflowers begin to bloom.


The recent flooding left no shortage of garbage along the trail. So i was able to find a cup to scoop up a bit of salamander and frog spawn to raise/observe at home. While reading online i found that if the egg masses look cloudy they were probably exposed to cold temperatures and probably will not hatch. We also found a old paint can that had been washed up and used it to bring home a small sample of frog spawn and a few live tadpoles as well. i transferred the frog egg mass into a large pickle jar and the frog eggs have already begun to hatch! Perhaps from the heat of our house. i've transferred them into a large pickle jar for now, and will have to get my aquarium set up for them. i would love to move them into our Frog Bog with our Bull frog tadpole, but he would just devour them up.

i'll be posting pictures of our tadpoles/frog development and hopefully of the salamanders too. We have never tried raising salamanders before, so i'm doing my research now.

We really enjoyed our nature walk at Beaver Dam creek, and am looking forward to exploring more of the trails along the Blue Ridge Highlands Loop. We have hiked several of them, but there is a still a few that we have not yet explored.

Wednesday, March 16, 2011

Wordless Wednesday: Rainbow Cake


No, life isn't all rainbows and unicorns. Though i do find that they help get us through the not so great times...especially when they come in the form of cake. :)

Recycle walk and a bit of exploring.

This weekend we took advantage of the beautiful weather and went for an afternoon walk up the road. We brought a garbage bag with us, so we could collect recyclables along the way. There is no bottle return policy here, and so the road sides are always littered with empty cans and bottles. Sometimes we pick up garbage along the road too, but this time we just cleaned up the recyclables. We left anything with questionable content. We can come back and pick up the nasty stuff when we have some rubber gloves on.

Just up the road from us at the top of the hill is this beautiful cow field. Often times the cows come up to the fence to check us out and moo at us, but today they were on the other side of the field. All along the fence line we found empty plastic bottles and cans and garbage.


About 1/4 mile from our house our bag was already almost filled up. Road side litter is very prevalent in this area. It always amazes me how someone could just throw their garbage down in a place so beautiful :(


The kids are always very eager to help pick up the litter, and it becomes a competition to see who can collect the most.


Another not uncommon sight. At the top of the hill, just off the road we found a dumping ground for deer carcasses. We counted 5, although there may have been more farther down the hill. These deer were most likely poached, the prime cuts of meat taken...the rest just dumped here. :(


While on our walk the kids ask to explore the cabins that are on the land next to us. The land belongs to folks that live in NC and is their family hunting land. They have several rustic cabins on the property. It has been several years since they have come up and stayed here. We were given permission to use these cabins any time that we like. We have never taken advantage of the offer, although the kids have been asking recently if we could spend the night here one weekend. It would make a fun adventurous overnight camping trip even though it's literally right next door.


There are two cabins, both are very simple, and rustic. No electricity or running water. There is an outhouse building, although we have yet to explore that. :) There is also a woodshed and garden type storage building.


Inside one of the cabin is neat loft with a ladder to access it.


My favorite part is this deck, nestled among the trees. It is such a peaceful area, not far from a fire pit. i would be a fun place to sit out under the stars one night and enjoy the beautiful of the forest.

We always have fun walking up the road and exploring the forest on the way back to our home. No matter how often we walk, we always seem to find something new. This time we stumbled upon a black walnut tree and the remains of the black walnuts on the ground around it. So this fall we will be able to forage for chestnut, hickory and walnuts.


"With the first step, the number of shapes the walk might take is infinite, but then the walk begins to define itself as it goes along, though freedom remains total with each step: any tempting side road can be turned into an impulse, or any wild patch of woods can be explored. The pattern of the walk is to come true, is to be recognized, discovered."
- A.R. Ammons, A Poem is a Walk