Showing posts with label homesteading. Show all posts

Tuesday, July 3, 2018

Bee inspection- replacing a queen and starting a nuc colony

About 2 weeks ago, we did a bee inspection and noticed that the bees in hive 2 (Slytherin) were bearding on the front of the hive and sounded really agitated. Sometimes they do this if it's really hot inside the hive, but once we opened up the hive we realized something else was going on. 


Once we started the inspection we understood why they were so agitated. We didn't find any eggs or larvae, which means their queen was most likely dead. 


This spotty broad pattern is another sign that things in the hive are not okay. Sometimes an unusual broad pattern can indicates a bad queen, but in our case it indicated that their was no queen. 


We checked all frames, but could not locate a queen, but we did find what we believe to be an emergency queen cell. We could have left the emergency queen cell and allowed the bees to raise a new queen, however we decided to move the queen cell into a 5 frame nucleus hive and requeen hive 2 with a local queen we were able to get from the bee association. This way they would have a new queen right away and be able to get back to maintaining the hive much quicker.


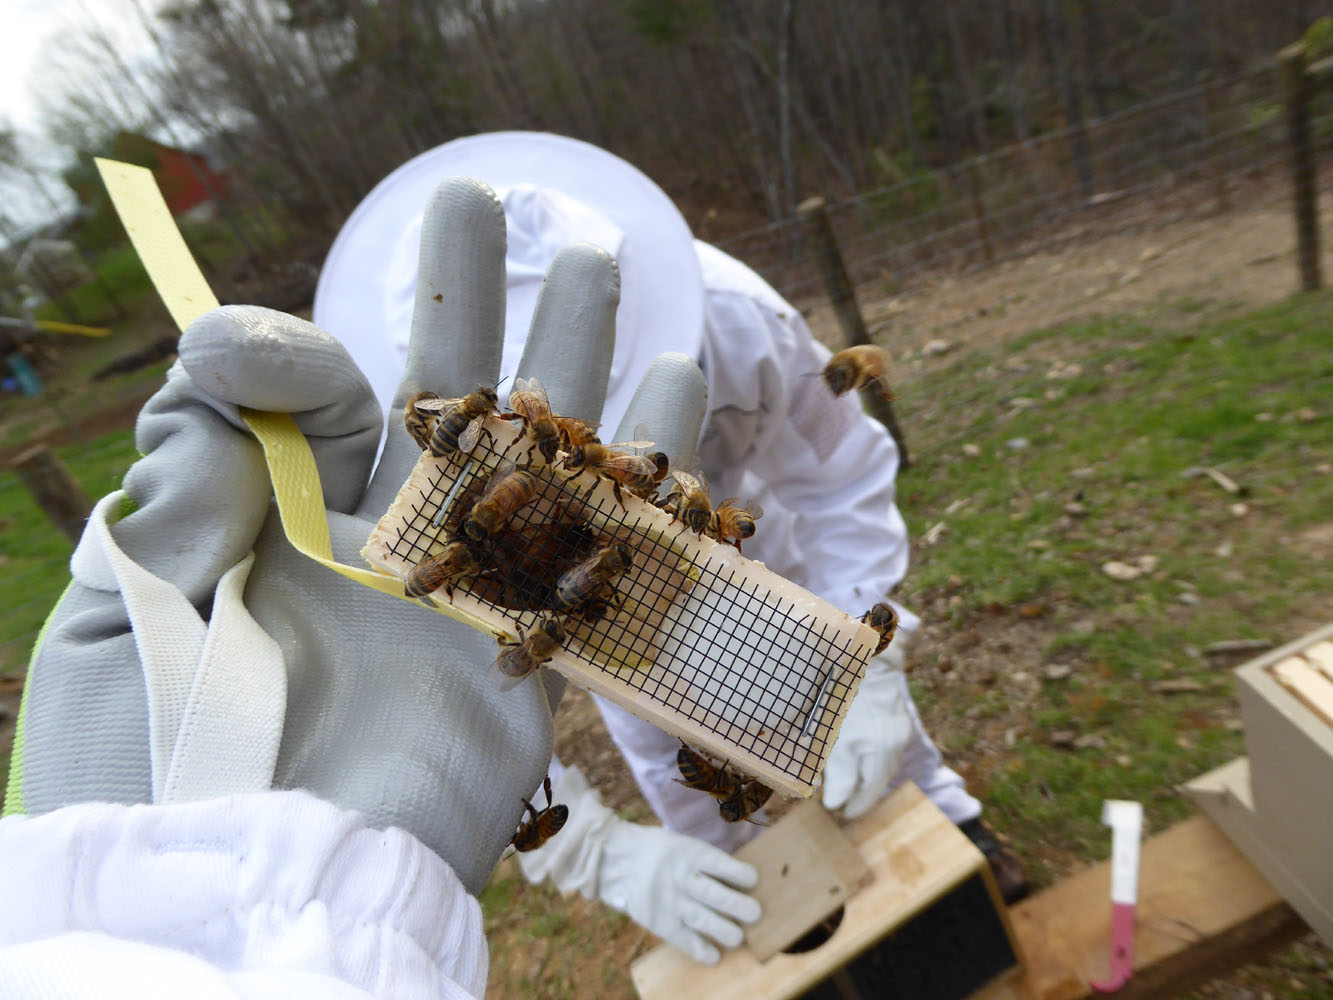
The new queen was introduced in a special queen cage (to keep the hive from killing her) and within a few days they had released and accepted her.  She is a marked queen and much easier to find than the unmarked ones. This week we'll be finding and marking all our queens. 


The emergency queen cell was moved to a nucleus hive with some frames of brood, larvae and worker bees. We are hoping to establish a nuc colony.  


Kenan has been building and painting more nuc boxes so that we can create more nucs. 'The term “nuc” is short for nucleus colony. A nucleus colony is just a very small colony of a few thousand bees and a queen. Reasons for maintaining a nuc: If one of your hives goes queenless, you have another queen ready to go. If you wait for your colony to re-queen itself, the population will drop such that you won’t get any surplus honey for that year. You can re-queen at times of the year when queens are unavailable to purchase. You can use the bees in a nuc to boost populations of a weak hive. If you don’t want to re-queen, you can just transfer some of the frames from your nuc into the weak hive. In addition, having an empty nuc box on hand is useful for catching swarms or removing extra bees from an overcrowded colony.' info taken from https://honeybeesuite.com 

We are hoping to start raising our own queens and have several nucs on hand. We'll be able to sell these or keep them to create more hives.  This has been such a good learning experience and we are constantly learning! Hoping we'll be able to pull a little honey this year, although you don't typically get a lot the first year. This year is more about learning, growing  and maintaining our hives.

We'll be doing another inspection in about a week and i'm hoping to have nothing but good news to report!

Monday, May 14, 2018

Mushroom farming and foraging.

Spring is a great time for foraging fresh mushrooms! Our favorites to find are the morels, but we've slowly been learning to safely identify and forage other types as well. 


We found a couple dozen morels in the woods behind our house. It wasn't a spectacular harvest, but i'm not complaining. We enjoyed them breaded & fried and also sauteed with butter & garlic. They are one of the easiest wild mushrooms to identify. 


 Last spring we plugged a bunch of logs with mushroom spores, and have been patiently waiting for them to fruit. It usually takes about a year, but we were getting a few here and there this past fall so we were hoping for a good harvest this spring.  We got a large water trough to help soak the logs to make sure they were staying damp enough.  Within just a few days of soaking these elm oysters began fruiting!


One of my first harvest pictures of the season. Homegrown spinach, lettuce, asparagus and oyster mushroom. i also foraged morels, chickweed, lambs quarter and purslane.


We have another oyster log beginning to fruit.  It has several clusters like this on it. 


 We also have a gorgeous shiitake coming in one of the logs. So far these have just been one at a time, i'd really love to see them take off and really fruit. The shiitakes are really yummy.


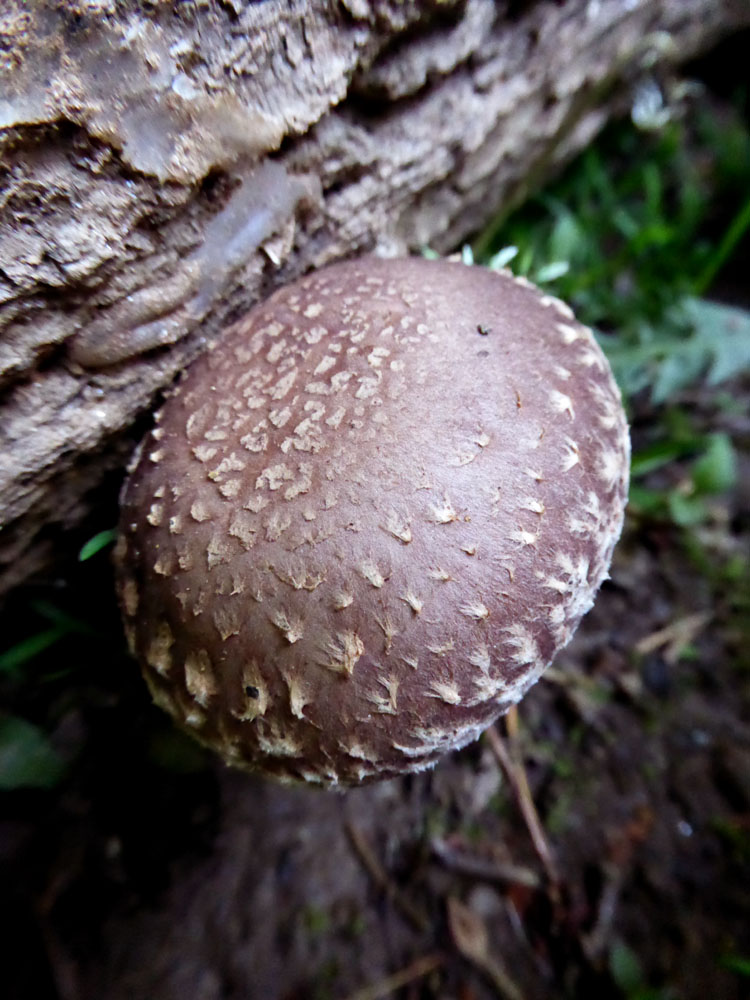
We spend so much time looking at our cultivated mushroom logs that we tend to forget about the wild ones that often fruit on the stumps of the trees that we cut about 7 years. Yesterday i was walking through the goat field and saw this giant flush of oysters in the woods on the other side of the fence. They were growing from a Tulip Poplar stump.

So far it's looking like a great mushroom season! We are in the process of plugging more logs and hope to continue cultivating fresh mushrooms for years to come.

Friday, May 11, 2018

Our First Bee Hive Inspection

We performed our first inspection of the new hives this week. It was a little bit nerve racking, as we were hoping for the best, but not sure what we would find.   It has been almost 2 weeks since we installed the bee packages. Installation went okay, but we had a problem with one of the top feeders and were concerned with that hive especially. We didn't know if all the queens had been released or if they had been accepted. Sometimes the hive will kill the queen in those first days.


We were super pleased to find a lot of new drawn out comb in all of the hives. We have been feeding the bees syrup and pollen patties and it appears to be working for them. It was really pretty cool they way we could check the frames and only a bees were buzzing around, most just seemed focused on their tasks and ignored us. 


We were able to find all 4 queens! They are busy laying eggs and seem to have no problems being accepted by the hive.  Can you find the queen? She's right in the center of the photo. She has the long skinny body. She is depositing her eggs in each of the cells.


We also lots of comb filled with glistening nectar and pollen. We saw larvae, and eggs in every hive! The first two are larger hives and seem to be behind a bit, i think because they work harder in the larger hive. The two smaller hives are almost filled up already. Larva and eggs are really important to see, because in a couple of weeks all of the worker bees will die and (hopefully) be replaced with the new brood. The worker bees only live 5-6 weeks during an active season. So if there isn't eggs and larva, in a few weeks time the entire colony will collapse.  


We found capped brood (baby bees) in the 2 smaller hives.  Very excited to see that things are going so well so far!!!!! We were really worried about the first hive that had the problem with the top feeder, but it looks like they have recovered well and are doing great! So far no one has gotten stung! 

Kenan has set up an electric fence to hopefully deter the bears that have become common visitors on our land. They are the biggest threat to hives right now. We'll be doing another inspection this evening and we'll be adding  brood boxes on the smaller 8 frame / medium box hives. We are pretty optimistic that we may get a little bit of honey this first year, which isn't always a guarantee. Looking forward to our hive inspection this afternoon, we are waiting for the kids to get home from school so they can participate. This has been a fun learning experience for the whole family.  In just the two weeks we've had our hives, i've learned so much about bees i didn't know.

Friday, April 27, 2018

Adventures in Beekeeping. We have bees!

We've been anticipating this day for quite a while, but we finally got our bees! The weather has not been cooperating, and so the date kept getting pushed back. This has been the coldest April we've ever experienced here. With snow showers several times the first 2 weeks.  All the flowers are about 2 weeks behind, so that pushed everything back two weeks. 


Kenan is both excited and nervous. Beekeeping is a pretty large investment, and the strange weather has made it feel like a bit of a gamble. Last year many very experienced beekeepers lost almost all of their hives. For first time bee keepers it's not unusual to lose a hive a two the first year. If the weather isn't cooperating the loss could be even higher. 


To keep the bees passive they've been sprayed with a sugar syrup solution. They are so busy sucking up the sweet treat, they become docile and kind of 'sugar drunk'  and so they don't attack.


When it warmed up we added our bees to the hive. Bee behavior is affected by temperature. They rarely work when the temperature is below 57 F or above 100 F. They cannot fly when the temperature is below 55 F.   So we wanted to wait until it was warmer to add the bees. First thing is to remove the feed can. 


Next you remove the queen cage and make sure she's alive. The queen has to be separated from the hive until they get use to her and accept her scent. There is a 'candy' plug at one end of the queen box. It should only take the worker bees a couple days to eat through the plug and release the queen. 


Once the feeder can has been removed and the queen is set aside you remove a few frames from the center of the hive and literally dump the bees in. Once the bees are in the box you replace the frames and place the queen box on top of them. Then you close up the hive box and hope the bees release and accept her. We checked our queen cages after 2 days and 3 out of the 4 queens had been released (we have 4 hives). So today we'll check the remaining queen to make sure she is out. If not, we'll have to remove the plug and manually release her and hope that she is accepted into the hive. 


We had a few hiccups with the top bar feeders we used in two of the hives, and switched to canning jar feeders.  It looks like all four hives are doing well now though We had a couple days of cool wet weather right after we installed them, but yesterday it finally warmed up and they were flying in and out and very active.


We may or may not get any honey the first year. It's all a learning process at this point, and we are really just hoping our bees survive. We hope to see an increase in the pollination our gardens and fruit trees and eventually we look forward to harvesting honey, pollen and honeycomb. 

We purchased our bee boxes from Brushy Mountain Bee Farm and our bee suits from Humble Bee US.  The bees were ordered through the local bee association.  If you are interested in keeping bees i would recommend taking a bee class and connecting with your local bee association. Although raising bees isn't difficult, there is a lot of information to learn. It's definitely the kind of thing you want to research before jumping into it. We'll be sharing our beekeeping journey on the blog, as well as the many other projects we have going on this year. 


Thursday, May 11, 2017

Growing Fresh Mushrooms at Home

Growing our own mushrooms is one of those things i've been wanting to do forever, but hadn't quite gotten around to it. i love foraging for morels, and have been learning a few other wild mushrooms that grow on our land and are safe to eat like chanterelles, giant Puff balls, lion's mane and more. i've posted about foraging mushrooms before.  i also grew oysters from a kit several years ago, 

i started looking into mushroom plugs last year, and found that they are really quite inexpensive. The problem i had was that i needed fresh cut logs to plug, and also holes drilled into the logs. Both of which required a bit of help from the husband. Sometimes our priorities are not the same, so i never got them started last year


Kenan did have a interest in growing mushrooms though,  and so he attended a mushroom woodshop last fall. This spring he decided he was ready to try growing mushrooms and put in an order to Mushroom Mountain.   i was really just interested in trying shiitakes, but he went all out and bought a bunch of different mushroom spores to try. 


Earlier this spring while he was working on clearing/flattening part of our land that may eventually be the new Tiemeyer Glass Studio, he cut down a large branch of oak tree.  The tree had been damaged several years before when we cut trees to pay for the new house. It was alive, but had a lot of damage to part of it, and really needed to be cleaned up. So the damaged area came off, and Kenan cut it  up for mushroom logs. 


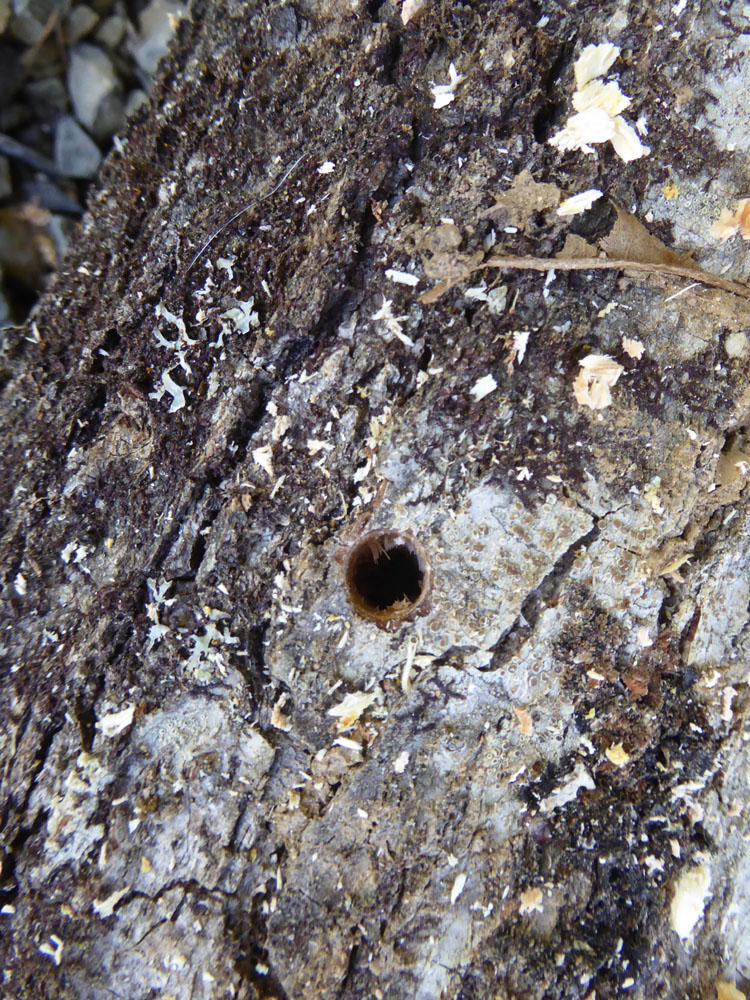
Growing mushrooms, is really pretty easy! First, the wood has to be freshly cut (usually within 6 weeks is okay) oak, maple, sweet gum, poplar, or other deciduous softwoods will work. Soak the logs by immersing in clean water for 1 – 2 days, but let the bark dry before inoculating.  Logs and stumps can be drilled, these are about 1/4 " diameter holes.  


The holes are then filled with wooden plugs that are colonized with the fungus of your choice.  We used a hammer to pound them into the logs.


 After the plugs are in, you can wax the surface to seal them in and protect them from drying out. .Once plugged, you need to soak/water the logs a couple times a week to keep them from drying out and then all you have to do is wait! When the mushroom’s root system has threaded itself throughout the log or stump, it will want to start fruiting. Fruiting can be seasonal, depending on temperature, and last several years.


This is a log  Kenan inoculated at the mushroom workshop last year. It has been completely neglected, just left outside and watered only by the rain. So we were a bit surprised to see this gorgeous Shiitake appear right next to one of the plugs.  At the suggestion of a friend, we soaked the log for 24 hours, so hopefully we'll start to see a few more appear.

This is pretty reassuring. If we can grow them without really trying, imagine if we put a bit of effort into them! We may actually get some good mushroom harvests! i believe the plugs we are trying are shiitake, oyster, lion's mane and hen of the woods. If these grow well, i'd love to try out some other varieties. Mushroom Mountain has a really good selection, and have great customer service.

You can also find more info about growing mushrooms here.

Tuesday, October 18, 2016

Olive Egger Mystery

You may remember earlier this spring when we ended up with a bunch of new chicks.  i was trying to hatch out olive eggers. Olive Egger chickens are not an actual breed, but a cross of two breeds — usually a blue egg layer and a dark brown egg layer. For example, when an Ameraucana hen's egg is fertilized by a Marans rooster, the resulting chick will be an Olive Egger who will lay olive green eggs. i only have one olive egg hen, and i've been trying to breed her with my Black copper Maran rooster, so that the female chicks would then lay dark olive eggs. When i tried this last year, i end up hatching out all roosters.  This year, i tried again, but the olive eggs kept disappearing or breaking.

Then my wild hens began disappearing and returning with chicks. We had to give away a bunch of them. i bet those crazy hens hatched out 60+ chicks. It was so frustrating, because i really didn't need any more chickens, i just wanted to have a couple more olive eggers.  Many of the new chicks look just like my other wild/gamey birds. A few have the same striped look of my Olive egger hen, leading me to believe one of the Olive egg roosters may have fathered them. 


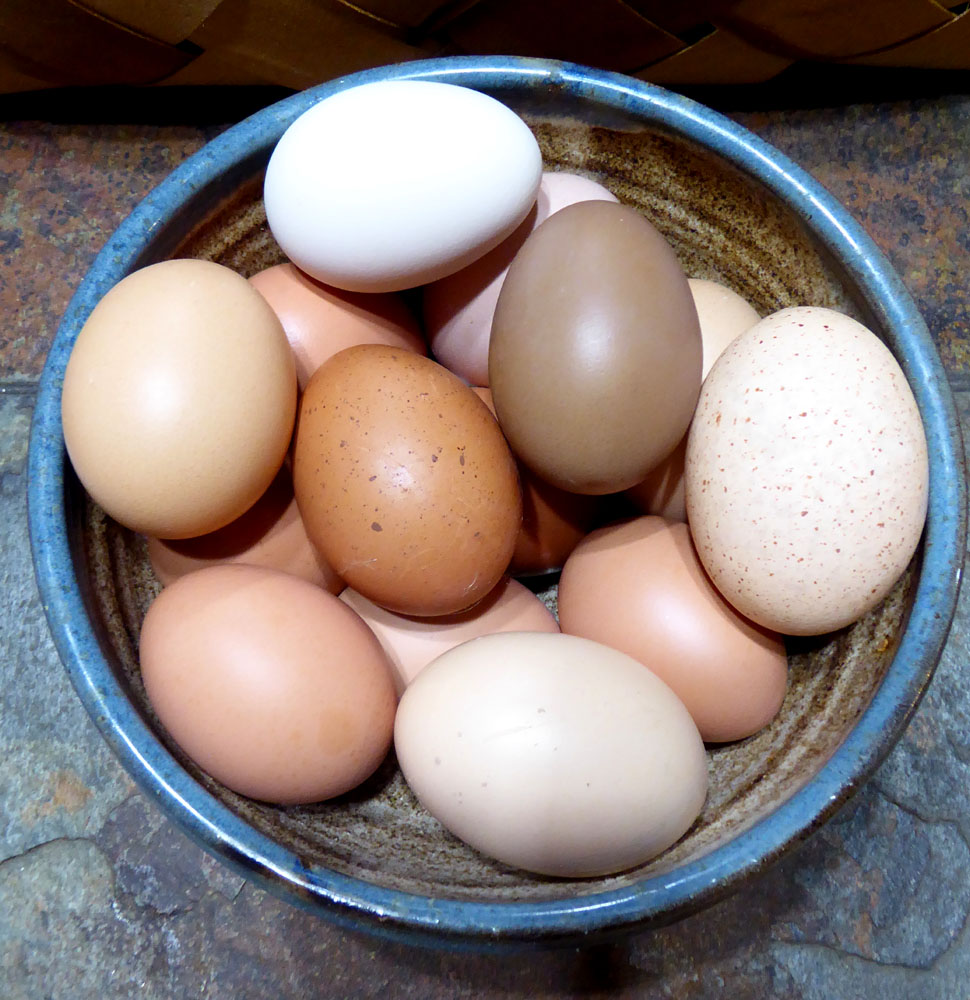
 i was under the impression that the roosters wouldn't carry the olive egg gene to pass on to their chicks, so imagine my surprise when a couple of my spring chicks started laying and i got an OLIVE EGG! It's a really dark olive too.  All three of these eggs came from chicks from that first clutch of 16.  There are two large fluffy gray hens in that batch that looks more like domestic hens than the wild girls. One has started laying the brown eggs that are just a shade or two lighter than my maran eggs, and the other is laying the olive eggs.  The bright white egg came from one of the wild girls, even though they typically lay an off white cream. 


My egg color variety is really fun right now. My marans are currently molting, but when they start laying again they lay the chocolate brown eggs. My original olive egger, Olive lays olive eggs like the one above but much larger and maybe just a hair lighter.


This is my beautiful mystery hen that is laying the olive eggs. i named her Gracie. She is such a gorgeous and unusual looking hen. My wild hen hatched her out, and she wasn't sitting on any green eggs...so i have no idea what Gracie  is a mix of.  Here, i've been trying to hatch out the green/olive eggs to get an olive egger and i get one without even trying. With the amount of wild birds we hatched out, i have to think she's probably not the only one. Although she is the only one with this look.  


In all my efforts to actually hatch out an Olive egger from an olive egg, i only ended with two chicks. As they grew i was pretty excited, because i was certain that both were girls. Then one morning i found one of them dead in the coop.  i believe my Maran rooster who is quite large may have crushed her, as they were fully feathered but still tried to climb under the other birds like they did with their mama. That left me with one Olive egger. This girl.  She is not laying yet, but when she does she should lay dark olive eggs. Even darker than the ones i'm already getting. She is a mix of Olive Egger ( americana/maran) and Black Copper Maran.  So i'm really excited for her to lay, although it probably won't be until the spring.

i've been trying to thin out my flock and give away as many of the new birds as i could, but now i feel like i need to wait until spring to see who may be laying olive eggs. One of the main things i had wanted to do it get the green gene introduced into my flock, so i wasn't dependent on my one olive egger for green eggs. If something happened to her, i would no longer have olive eggs and Olive eggers are difficult to find. However, Gracie has proved that i don't have to hatch them out of olive eggs, the roosters must also carry the gene.  So i really think i've succeeded in that. i can't wait to see what other egg colors we end up with.

Saturday, June 4, 2016

Garden Progress June 1st.

i can't believe it is already June!  i haven't started to completely panic about being behind, but i may start to pretty soon. i still don't have my garden completely in, but everything has been planted and is growing well in the greenhouse. So even though it's not in the garden, it's still planted and doing well. i just need to spend one day getting everything in the ground.

Kids are out of school for the summer, and we are starting off our summer vacation with one sick kid (fever and cough) and mama sick from the Doxy i'm taking for Lyme.  Good times!


Picked our first homegrown salad a few weeks ago. All of my cold crops are planted and doing great.   i've been picking lettuce, spinach, swiss chard, kale and asparagus for a few weeks now. Also a few small carrots and radishes.


Just this last week i started getting broccoli and garlic scapes too. i finally decided to use row covers this year and for the first time ever, i have beautiful worm-free organic broccoli! It's your trying to grow anything in the cabbage family, row covers are the way to go!! 


No worms, aphids or bugs of any kind! why did it take me so long to figure this out? lol.


i also have cabbage, cauliflower, purple sprouting broccoli and fractal broccoli all under row covers.  i also have one on some cucumber plants. i'm eager to see if i can actually grow cucumbers without getting sudden wilt from the cucumber beetles.


My peas took a beating when we had a hail storm back in April, so i had to replant most of them and they are finally starting to bloom. i planted regular sugar snaps, and also these Blush tendril snap peas from Baker's Creek. The blossoms are so pretty, and they climb like crazy. The pea pods are supposed to be blushed with pink as well.  i hope that they are as sweet and tasty as sugar snaps. 


Eggplants are doing fantastic in the greenhouse.  They never seem to do very well in the garden. Flea beetles tend to eat the leaves and then they end up somewhat stunted and never really recover.  The last couple years i've succesfully grown them in pots, so this year i planted a bunch in pots and plan to keep them safe in the greenhouse, moving them outside occasionally if it's too hot inside.


This year i totally over planted tomatoes again. i have a bunch in the greenhouse, and a bunch in the garden...plus tons of starts just waiting to be repotted and planted.  Having a place to actually start seeds has been so wonderful.  Everytime i move plants out of the greenhouse i start more seeds. :) 

Growing in the greenhouse is a bit of an experiment this year. i'm not sire if it will get too warm for the plants to pollinate or if some will have to be hand pollinated...or if they won't work out at all. My husband built a larg raised bed inside the greenhouse and i have tomatoes, eggplant, peppers, carrots and lettuce planted in it. So far everything is doing great.  i'm able to vent the greenhouse, and with the magnetic screen door i can keep the doors open.  i already have lots of green tomatoes. My only challenge is keeping everything watered. The plants tend to dry out quickly, and i feel i'm constantly watering them.

We have the rainwater collection cistern set up for irrigation, but it really hasn't rained much this spring so i worry that i'm going to drain it by the amount of water i've been using.  

So far it all going well, and i'm trying to make a point of documenting it all so that next year i know what works and what doesn't.  i'm really hoping for a productive year though and feel like the greenhouse is really a benefit for my garden and homesteading path. 

Tuesday, March 15, 2016

The Weekend Homesteader- Review

The Walden Effect is one of the very first homesteading blogs that i began to read regularly.     i've been following along on their homesteading journey for a few years now and have always been impressed and inspired by many of their projects. They are constantly finding new and better ways to help themselves become self sufficient and sharing the progress on their blog.

So i was really excited to see that Anna was putting all of these great ideas into a book.  When the book first came out, Dec. of 2012 i volunteered to do a review of the book on my blog. However, our house burned down in January of 2013 and i lost the book and had not yet finished putting the review together. Yesterday, i was cleaning uip all the unpublished drafts and found this review. i'm only 3 years late, but still wanted to post the review that i had committed to back in 2012.

The Weekend Homesteader is organized by month—so whether it’s January or June you’ll find exciting, short projects that you can use to dip your toes into the vast ocean of homesteading without getting overwhelmed. If you need to fit homesteading into a few hours each weekend and would like to have fun while doing it, these projects will be right up your alley, whether you live on a forty-acre farm, a postage-stamp lawn in suburbia, or a high rise.

You'll learn about backyard chicken care, how to choose the best mushroom and berry species, and why and how to plant a no-till garden that heals the soil while providing nutritious food. Permaculture techniques will turn your homestead into a vibrant ecosystem and attract native pollinators while converting our society's waste into high-quality compost and mulch. Meanwhile, enjoy the fruits of your labor right away as you learn the basics of cooking and eating seasonally, then preserve homegrown produce for later by drying, canning, freezing, or simply filling your kitchen cabinets with storage vegetables. As you become more self-sufficient, you'll save seeds, prepare for power outages, and tear yourself away from a full-time job, while building a supportive and like-minded community. You won't be completely eliminating your reliance on the grocery store, but you will be plucking low-hanging (and delicious!) fruits out of your own garden by the time all forty-eight projects are complete.

The best thing about the book for me, is that the weekend projects that are arranged by month.  i personally have a tough time with organization, and it's really nice to find a guide with everything already  laid out for you. The book is broken into months, with four projects per month.  It can be read cover to cover, or used as a simple guide to flip through and complete projects that you have time for or are most  relevant to you. . It's really a wonderful beginners guide to get you started, but also offers some really good information for seasoned homesteaders.  i highly recommend it and also suggest that take a peek at The Walden Effect blog.


Visit her  blog at Walden Effect
 You can follow along on their facebook page.
 here's a link to book http://www.amazon.com/The-Weekend-Homesteader-Twelve-Month-Self-Sufficiency/dp/1616088826

Wednesday, March 2, 2016

Cow Shares, homemade butter and cheese making.

Several months ago we purchased a cow share from The Sweet Land Farms .
What is a cow share?  A cow share allows you all the benefits of owning your own dairy cow, but none of the work! Virginia Department of Agriculture wants all milk sold to be heavily processed. It is not legal to sell raw milk. So to receive fresh, unprocessed milk, you need to own your own cow so you can drink it how ever you like it.
When you purchase a cow share, you purchase a portion of a cow and then pay a monthly boarding fee for them to board/feed your cow for you. Since we own a share of the cow, we get a part of her milk production. 


 In 2013 after we lost our home in a fire we rented a house that was right next to The Sweet Land farm. These lovely Jersey cows hung out right behind the house munching on the fresh green grass.  We saw first hand how they were treated, met the folks that run the farm and watched the cows lazily hang out in the grassy fields and line up when it was time to milk.   It was definitely a local business we were happy to support. The cow share provides us with one gallon of fresh raw milk each week.


Jersey milk is high in natural butter fat content.  See all that lovely cream at the top of the jars? Each week we skim that off to make fresh butter. Sometimes, i'll make butter with the cream from one half gallon and use the cream from the other to make Red Pepper fettuccine.  It's so good!!   We really don't drink a lot of milk, so the one gallon per week is the perfect amount. Sometimes we only make it through 1 half gallon by the time we are picking up milk again, so i use the extra milk to make Mozzarella cheese.  This is something i have always wanted to do and i was quite surprised how easy it is. 


i followed the directions from The Cheese making website. First i separated some of the cream from the milk. Then i put the milk in a non-reactive pot and added 1 1/2 tsp citric acid. i heated the milk to about 90 degrees F. i do not have a digital thermometer, so i used a candy making thermometer.  Once the milk reached the correct temperature i added vegetable rennet and let it sit for about 5 min. Then you cut the curds, and heat them up again to about 105 F. remove from heat and stir for a few minutes. Then drain the curds, reserving the whey for ricotta. Press out any remaining whey and microwave about 30 sec.  knead and reheat another 30 sec or until the cheese reaches 135 F. It will be very hot.  


Knead the cheese as you would bread dough, and it should begin to stretch.  Continue stretching it, and stretching it and then form it into a smooth shiny ball. That's it!! Then i use the left over whey to make Ricotta


This is what you can get out of one gallon of  raw milk. i made about 12 ounces of fresh mozzarella . A ball of fresh butter, around 1 cup of buttermilk, around 1 1/2 cups of fresh cream and 1 cup ricotta cheese. i also had over a quart of whey, which can be added to soups and smoothies etc.

Although my goal has always been to milk my own dairy goats, it just hasn't work out for me yet and i admit i am really enjoying the cow share. If you are interested in learning more about raw milk and cow shares check out http://www.realmilk.com/real-milk-finder/  to find a farm near you.  i highly recommend that you visit the farm, meet the farmers, meet the cows and see their milking practice. 

Monday, February 15, 2016

Around the homestead- reflecting back on a good year and new year goals.

It's so hard to believe that it is 2016. The older i get the quicker time seems to move.  We are now almost 3 years post fire, and life is pretty much back on track. We have found our new normal, and are slowly turning this house into a home.


For Thanksgiving this year, almost everything came from the garden. i did purchase a Tofurky roast, which is more of a novelty than anything. It wasn't necessary for our meal, but we enjoy them and like the idea of a very 'traditional' thanksgiving meal even though we are vegetarian. Our meal included roasted roast vegetables, butternut squash soup, Acorn squash stuffed with apples, pecans and honey. Fresh salad, garlicy greens and pumpkin pie. 


My hens took a little time off to molt and rest over the winter, but now that the sun is returning they have begun to lay again. i'm really thrilled with the variety i'm getting now. Still just missing the blue. i took this photo in the snow and the colors really just popped.  i don't think i'll ever get tired of taking egg pictures. 


Just like every year, i had a lot of issues in the garden. We had a really wet  rainy summer, and it caused the diseases like Septoria leaf spot, early blight and powder mildew to spread like crazy. i harvest quite a bit, but it felt like i lost a lot as well.  Even though i was canning all summer, the canned goods were just stored in boxes and hidden away in the basement, so i really didn't know what all i had.  It kind of left me feeling like i had wasted the whole summer for nothing.

Then Kenan put in these shelves in the cold storage area downstairs and we pulled out all the canned goods and set them up on the shelves.  This is the first time ever i've had a pantry to store all of my canned goods. The shelves are  24" deep, so i can store a ton of food.  i also have my potatoes, sweet potatoes, winter squash, onions and garlic in the baskets.  Below the shelves are storage bins with holiday decorations and craft supplies.  It's a pretty amazing feeling to see it all laid out like this and to really recognize all of the hard work i did over the summer. 

This spring we are planning to get a real greenhouse, fence the garden and really try to improve the soils in our gardens. We are also going to work on improving the goats area, and setting up our cistern to be solar powered. Kenan is also talking about getting an overflow tank for cistern.  That way we would have an almost unlimited supply of water for garden irrigation.

 We had also originally talked about putting in a second well, since ours is low flow and really doesn't produce enough water for our household, especially as the kids get older and want to shower more often. However after doing a bit of research, we are instead going to try to tap into two artisan spring heads that are behind the house.  The goal is to set up a 1500 gallon potable water tank using solar powered water pumps.

So yeah, we have a lot of plans for the year.  i will try to document our progress, but it seems more and more difficult to find the time to put together these posts. Even now in the winter when i have more time, i spend it working on dolls, jewelry or in the glass shop.  i'll be posting about that eventually as well. i'm really excited about the work i am doing this year, and look forward to share

Wednesday, April 15, 2015

Around the Homestead- Garden Season, Progress and Planting fruit trees.

Spring is always such a wonderfully busy time of year. It has been several years since we've had any real time to do real things on our property. For a while there was the financial struggle, then Kenan's glass business really started to do well, but there just wasn't enough time to do all the work that needed to be done. Then in 2013, we lost everything in a fire and had to start completely over. 

We are beginning to feel somewhat recovered, and are really trying to catch up and make some major progress this spring. Broke my heart when we had to clear some land, but now we have a great place to plant an orchard! Put in 6 new fruit trees so far. Kenan has been busting his butt to get stuff done so i can get planting!

The gardens have been tilled and fenced. This is garden #3. It use to be my cold crop garden, but after clearing some of our land it is now getting full sun. So i will probably plant mostly beans and squash in this spot this year, still trying to plan out where everything will go.


Garden #4 is inside the goat field. It's been tilled and fenced, and potatoes have been planted. This year i put in blue, purple, red, yellow and white potatoes.  i'm going to put something in with them, possibly beans and onions, but i haven't decided what i'm going to plant in here yet. Last year i planted corn and squash in this bed, and the temptation for the goats was too much and they broke down the fence and ate all of the corn right down to the ground. They didn't bother the squash at all though, so i may try planting squash as a border. 


The tiered beds have been tilled and expanded. :) Always expanding.


Garden #2, is my early spring garden. There are 3 small raised beds in this garden. One has asparagus, garlic and lettuce. Another is strawberries and garlic and the last one i put in beets and carrots. My soil is so full of clay and rocks, my root veggies never do very well.  So i thought i'd try them in the raised bed.  i also have sugar peas planted along the fence, broccoli, cauliflower, lettuce, spinach, garlic and kale in this garden.  i planted packman broccoli, which has always done really we for me. i also planted Romanesco (fractal) broccoli, Sicilian violet cauliflower and purple sprouting broccoli. i tried some of these last year, but they didn't do well. i got an earlier start on them this year and am hoping they will well.


i've got all kinds of pants started inside my little cheap greenhouse.  The wind rocked it pretty good last week and the shelves fell off, so i had to restart a bunch of tomatoes.  i reinforced the greenhouse to hopefully keep it from rocking as much and ziptied the shelves, so they can't fall off as easily. When i first saw the greenhouse i was devastated, as it looked like i'd lost almost everything. However once i started lifting up the posts i found i was able to recover almost everything.


First garden harvest was this week. Most of these baby greens came from my hoop house (pvc hoops covered in plastic). As i was weeding the lettuce i picked and  added some dandelion and chickweed to the salad. Also picked a couple asparagus, and added the sweet violets for color. 

Besides getting the garden tilled and fenced, husband put in a rope swing for the kids. He  transplanted several nice peach trees, and moved the Nanking cherry bush which had been dug and dumped on the edge of the driveway during construction.  

He is also working on cleaning up the land that was cleared, and has already started planting fruit trees in what will hopefully eventually be a small orchard. We planted several apple trees; Winesap, Stayman - Winesap, Red Delicious, and Honeycrisp. We are planning to add a couple more including a pink lady and a Gala. We also put in Tartarian black cherry and  another Moonglow pear tree.  We have another cherry tree, two plum trees and 4 blueberry bushes that need to be transplanted into the new location.  Once the cleared land has been cleaned up we'll be putting in more blueberry bushes there.

We also planted a new Clematis vine, Crepe Myrtle bush, Wisteria vine, and 2 new Lilac bushes. We are just starting to work on the landscaping a bit.    We're having a week of rain, so everything is really just starting to come up and grow but we have to put our outside work on hold a bit. i'm already loving the progress, though. We are getting our chicken coops set up better, so that we can travel a bit without worrying so much about them.  The way they are set up now, they have to be closed in every night, or we risk predators getting in and killing them. So even an overnight trip is stressful. i'm hoping the new improvements to the coop and feeders with make things easier, and allow up to travel a bit again.  i love the springtime.  i love all the new growth and transformations. It always feels like the beginning of everything.


I think that no matter how old or infirm I may become, I will always plant a large garden in the spring. Who can resist the feelings of hope and joy that one gets from participating in nature’s rebirth? ~Edward Giobbi