Thursday, July 7, 2011

Knotty Val artist feature and Giveaway! CLOSED


i'm really excited to share my latest artist feature with all of you. Val is a good friend of mine, and an extremely talented artist. She does some of the the most detailed and extraordinary knotwork i have ever seen. She is also a very taleted beader and painter! You should see the mural she painted on the back of her neighbors shed! Unbelievably cool!


A bit about Val.
"I have always been drawn to color and pattern. Straight lines and monotones bore me. I love trying new crafts and "up-cycling" old stuff. If I can paint it I will. A picture framer for more than 20 years I have had the good fortune to see amazing art from all over the world and from all types of artists in all walks of life....just going to work everyday. Art impacts our lives every minute of everyday, something I am sure I already knew but it was driven home working with people, helping them to display and conserve their personal treasures."


"When my daughter was born in 2004, I wasn't really expecting her, I was getting ready to have a teenager and my very own craft space in our new house but that became a nursery and crafty plans went on hold for me. When I first got online and discovered the community of crafty people there I was inspired to start weaving again, it being something I could do that my young daughter couldn't do much damage with."


"I have been so inspired to keep creating by the women and men I have met in this online community. My daughter loves art and I am really looking forward to sharing all my crafty cravings with her. I have always been happiest when creating and working with color."


"I taught myself to flat weave after a friend bought a Guatemalan "friendship" bracelet while on tour following the Grateful Dead. I love to do beadwork too, and look forward to the day when I have a dedicated space for beading.


Val has offered a special discount to my readers. Use the coupon code "123buyknotty" to receive 20% off anything in the shop, does not include shipping.

Now for the Giveaway!!!
Val has offered this beautiful bracelet to one of my lucky readers!!
This lovely bracelet measures

1 1/4" wide and 6" long. It has 9 colors and 36 strands.


MANDATORY ENTRY CLOSED

1. Head over to Knotty Val on Etsy then come back and let me know your favorite item!
Please include your e-mail address or make sure it is visible in your blogger profile so i have a way to contact you if you win. Otherwise a new winner will be chosen!

EXTRA ENTRIES
please leave a new comment for each extra entry. If you qualify for 5 entries, leave 5 separate comments.
(make sure you did the mandatory first!!)
1. Add Knotty Val's Etsy Shop to your favorites (heart) 1 entry
2. 'Heart' your favorite item in her etsy shop.
3. Like Knotty Val on facebook the 1 entry
4. Follow my The Enchanted Tree blog via google friend connect. 1 entry
5. Be a fan of The Enchanted Tree on Facebook. 1 entry
6. If you have purchased an item from Val in the past (recently or back in the day) leave a comment on her facebook wall about the item or where/when you got it. Then comeback here and leave me a comment letting me know you you did! 1 entry!
7. Share this giveaway with your facebook friends, Tweet the giveaway or Blog about it! 1 entry each.


**Rules**
  • Giveaway ends July. 21st 11:59pm EST
  • Winner will be chosen via Random.Org. i will then contact them by email, and post the winners name on my blog.
  • Winner will have 48 hours to respond to the email or another winner will be chosen
  • This giveaway is open to everyone.
Wednesday, July 6, 2011

Tuesday, July 5, 2011

Patriotic Ice Pops.


We made these patriotic whole fruit pops earlier this week. They are really easy and the kids loved them!

As with everything, i never write down a real recipe...so you just have to wing it.

We used fresh raspberries, lemonade and blueberries...they could be made using strawberries, cherries, blackberries...whatever you have. You could also use white grape juice instead of lemonade.

i started with the raspberries. i used about a handful of fresh red raspberries and smashed them with a fork and added about a tablespoon of lemonade. They were pretty tart, you could always add a bit of honey if you prefer them sweeter.

Then i spooned the smashed raspberries into popsicle molds so that it fills the bottom 1/3 of the container. Then place in freezer until frozen solid.

Next i added lemonade to each popsicle mold, so they were about 2/3 full. Freeze until almost solid.

Now i added blueberries to the next layer. i didn't smash them, i left them whole and added a bit of lemonade to hold them together. Then put my tops on and froze them.

That's it, super easy!

Berry Season.

Berry Season is now in full swing! For us Berry season usually starts with the strawberries. We didn't really get very many strawberries this year, which is fine. They had started spreading into the main garden, so i decided to move them all into a new bed. i knew that doing so would probably shock them a bit, but they really needed to move. Hopefully next year, we'll get some.

Red raspberries came next, and they have been extremely abundant! i wasn't sure i would get any picked with the kids out there eating them every chance they could. i was able to pick and freeze over a gallon of red raspberries. i decided not to make any jam with them, as i still have a quite a bit left from last year. We really enjoy the frozen fruit in the summer time in smoothies, made into sorbets, added to yogurts. These are also everbearing raspberries, which means in a few months they will be producing again.


Next comes the blueberries, which have been doing fantastic this year. i already have 2 gallons frozen, and theat was before i took this picture! The bushes are completely loaded! We planted three new blueberry bushes this year, giving us a total 14 bushes now. Several of them are still small and not producing well, but in a few years they should be.

Doesn't seem to matter how many blueberries we get every year, it just never enough. We love them so much. They kids are always eating them right off the bushes, and the frozen berries won't even last until Dec. almost guaranteed. We use them in pancakes, waffles, muffins and so much more!


i have always loved foraging for food. i am continuously amazed by the amount of wild food available if you just look. All along the wood line of the area that we just cleared are wild huckleberries or lowland blueberries. i haven't figured out exactly what they are, except that i know they are in the blueberry family...and they are delicious! We also found tons of shrubs that are definitely in the blueberry family loaded with berries. They look similar to blueberries, but are still green right now. i've been watching for them to ripen so i can try to identify them. i believe that they are deerberries or farkleberries.
i've read conflicting info on whether they are palatable to humans. They are both in the blueberry family so they are not poisonous. They may just be hard or bitter and better left for the wildlife.

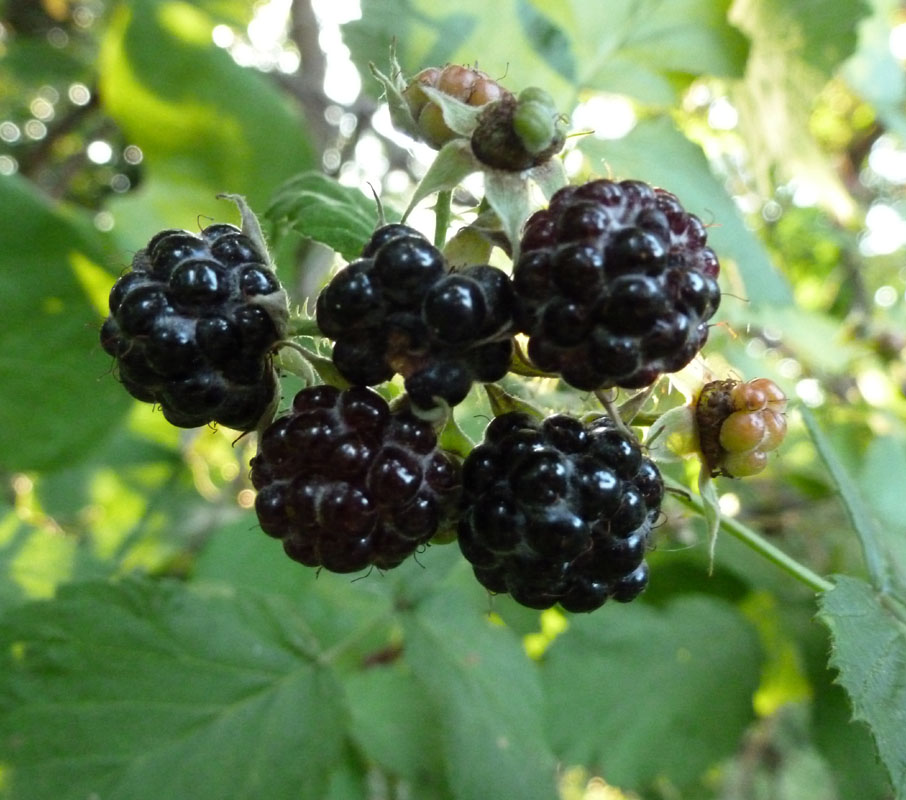
Black raspberries are just starting to ripen. i picked and froze about a quart earlier this week. We finally got a good rain, so i'll be out picking more all week. We have these growing all along our woods line, and across the road bordering the barbed wire of the cow fields.

Blackberries are not quite ripe yet, but it is going to be a very good blackberry year. All the black berry patches i've seen are completely loaded!

This year i finally found a patch of Wineberries! i've been looking for these ever since i first heard about them almost 10 years ago. i was told they grow around here, but couldn't find them and when i talked to the locals no one knew what i was talking about. . Last week, i stumbled upon a huge thicket of them. These are actually the flower buds, they are not in fruit yet. They look very similar to red raspberries when they are ripe and can be used the same way.
Now that i found the patch, i'll be back to pick some when they ripen. i'm also planning to dig up a few canes and will hopefully have my own wineberry patch established in a few years.

Sunday, July 3, 2011

Giant Bubbles re-visited.


Bubbles, bubbles and more bubbles. Our summer has been filled with giant bubbles. i have a lot of folks ask us how we made our giant bubble wands and what bubble solutions we use. i also get a lot of traffic to our original post about giant bubbles, so thought i would re-visit it, and share a few tips that we have learned.


These bubble wands are extremely easy/inexpensive to make, and so much fun! The kids have spent hours outside making bubbles. My boy is quite good at making some monstrously huge one, and my girl is extremely good at popping them. :)


i think this bubble is a record breaker for us! It was enormous!
i can give you a brief explanation on how they are made. The tutorial link i posted in the original thread is not longer available.

They are honestly very simple, and can be made with a few basic supplies.
We used 2 wooden dowels.
2 screw in eye hooks.
100% Cotton cord or yarn.
a metal washer or addition eye hook to use as a weight.

So all you do is screw an eye hooks into the end of each dowel. Then cut two pieces of the cotton cord, around 35" for the top piece, and 70 " for the bottom. i didn't actually measure mine, just guesstimated. You can really make them any size you like. You just want to make sure the bottom piece is twice as long as the top.

When we first made these i could not find the cotton piping suggested in the original tutorial, but did have 100% cotton yard. i did a quick chain stitch to make a crocheted cotton cord and it worked fine. If you don't know how to crochet, you could braid the pieces so they are a bit thicker and heavier than a single piece of yarn.
Now tie the shorter piece of yarn to the eye hooks, connecting them and then slip the washer/eyehook/weight onto the longer piece and tie it to the eye hooks under the top cord.


That's it! Now dip it in your bubble solution ( We used dish soap and water) and have fun!! i didn't use an exact recipe for our bubble solution. i use water and a couple really big squirts of dish soap until it works. If you bubble keep popping before they leave the wand, add more soap. We have had the best luck using Seventh generation dish soap, Full Circle Dish soap and plain Ivory dish soap. In our experience generic dish soaps do not work at all. Also if it is it windy out, the wind tends to pop the bubbles before they leave the wand. So you'll want to do this on a calm day.

It took my boy a little while to get the hang of it, but then once he got it he was a bubble making expert. We figured out that if you gently bring the ends of the wand together, it will cut off the bubbles. So you can make 3 or 4 giant bubbles that float away with just one dip in the bubble solution.


Check this link for some addition homemade bubble recipes.

If you like bubbles, you absolutely must try this! Happy bubble blowing!